
How to Install Grab Bars on Drywall, Tile, or Concrete: A Step-by-Step Guide
- Mar 14, 2025
- 3 min read

Installing grab bars is a simple yet crucial upgrade for improving safety in your home, especially in bathrooms and high-traffic areas. Whether you're working with drywall, tile, or concrete, having the right tools and following proper installation techniques ensures that your grab bars are secure and reliable. Here’s a step-by-step guide to help you install grab bars like a pro.
Tools and Materials Needed:
Grab bars (preferably ADA-compliant)
Stud finder
Level
Drill
Drill bits (for wood, tile, or masonry)
Screwdriver
Toggle bolts (for drywall)
Anchors (for tile and concrete)
Measuring tape
Pencil or marker
Safety goggles
Installing Grab Bars on Drywall
If you're installing grab bars on drywall, you must secure them to wall studs for maximum support.
Step 1: Locate the Studs
Use a stud finder to locate wall studs. Mark their locations with a pencil where you want to install the grab bar. Studs are typically 16 inches apart.
Step 2: Mark Drill Holes
Hold the grab bar against the wall, aligning it with the stud locations. Use a level to ensure it’s straight, then mark where you will drill.
Step 3: Drill Pilot Holes
Using a drill with a wood drill bit, create pilot holes at the marked spots. This will make it easier to drive screws into the stud.
Step 4: Attach the Grab Bar
Position the grab bar over the pilot holes and secure it using long screws (at least 2 ½ inches) to anchor it firmly into the studs. Tighten with a screwdriver.
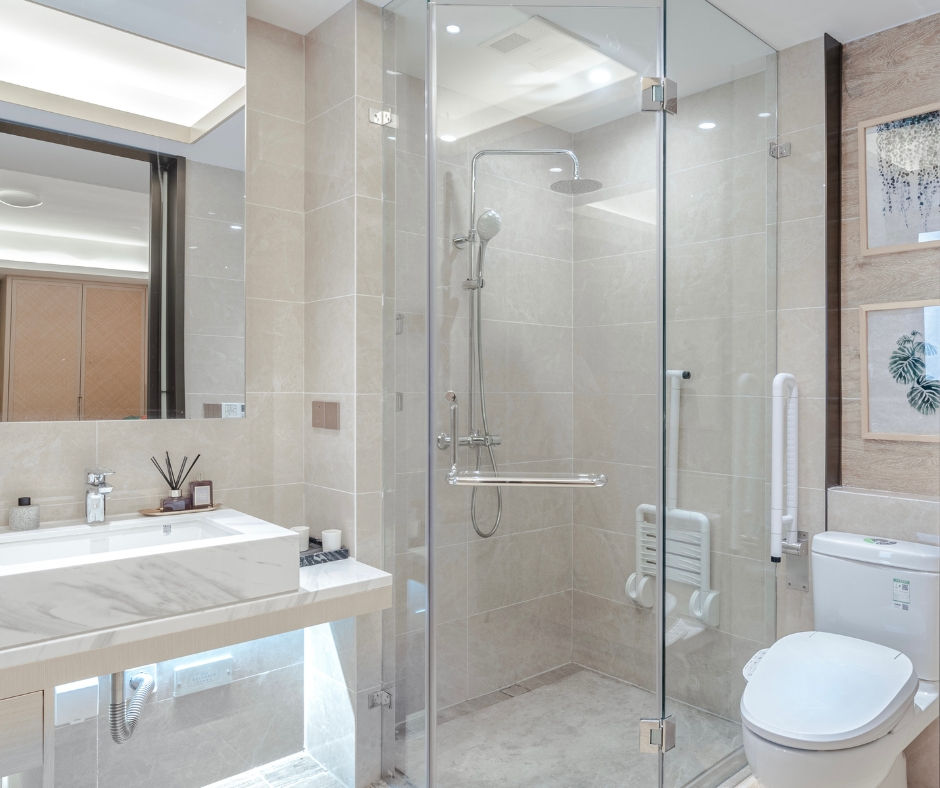
Installing Grab Bars on Tile
Drilling through tile requires special techniques to prevent cracking.
Step 1: Mark the Placement
Use a pencil or masking tape to mark where you will install the grab bar.
Step 2: Drill Through the Tile
Use a carbide-tipped drill bit for tile. Start drilling at a slow speed to prevent the tile from cracking. Once you reach the drywall or backing material, switch to a standard bit.
Step 3: Insert Wall Anchors
If you cannot hit a stud, use tile anchors or toggle bolts for extra support. Insert the anchors into the drilled holes.
Step 4: Attach the Grab Bar
Align the grab bar with the drilled holes and secure it using screws. Tighten until the bar feels stable.
Installing Grab Bars on Concrete
Concrete walls provide a strong foundation, but you’ll need masonry anchors for a secure installation.
Step 1: Mark Drill Points
Hold the grab bar in place and mark the screw holes using a pencil.
Step 2: Drill Into the Concrete
Use a hammer drill with a masonry bit to drill holes at the marked points. Go slow and steady.
Step 3: Insert Anchors
Push concrete anchors into the holes. Tap them gently with a hammer to ensure a snug fit.
Step 4: Secure the Grab Bar
Position the grab bar over the holes and use screws designed for concrete to fasten it. Double-check the stability.
Final Tips for a Secure Installation
Use a level to ensure the grab bars are straight.
Test for sturdiness by applying pressure before using them.
Consider professional installation if you’re unsure about handling power tools or drilling through tile and concrete.
For expert grab bar installation, visit Grab Bar Los Angeles. Our team ensures safe and secure installations, so you don’t have to worry about a thing!
Resources:
Americans with Disabilities Act (ADA) Guidelines: www.ada.gov
Safe Grab Bar Placement Tips: www.nahb.org
Home Safety Checklist for Seniors: www.aarp.org


Comments