
Accessible Toilet Grab Rails: Layouts for Every Bathroom Size
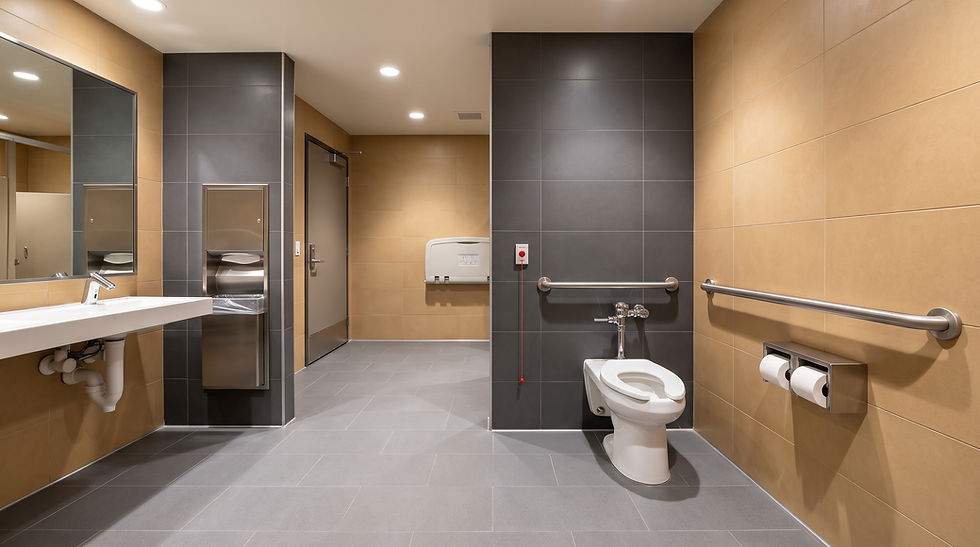
ADA guidelines describe an ideal toilet-area grab rail layout: a side-wall bar, a rear-wall bar, specific heights and clearances. But a lot of real bathrooms don't match that ideal. Powder rooms with no side wall, narrow layouts where a standard bar won't fit, and older homes built long before accessibility was part of the design all call for a different approach — one that still delivers real support, just adapted to the space available.
This guide walks through how to plan accessible toilet grab rails across different bathroom sizes and layouts, so the solution fits the room instead of forcing the room to fit a standard that doesn't apply.
The Standard Layout: What ADA Describes
In a bathroom with enough space, the ADA-recommended layout uses two bars working together: a side-wall bar mounted 33 to 36 inches above the floor, extending at least 42 inches along the wall, with its front edge no more than 12 inches from the rear wall, plus a rear-wall bar for additional support standing up from a seated position. This layout gives the most consistent support through an entire sit-to-stand transfer, which is why it's the reference point most grab rail guidance starts from.
The challenge is that this layout assumes a side wall exists within reach of the toilet — and in a meaningful number of bathrooms, especially smaller or older ones, it simply doesn't.
Layout 1: Full Side Wall Available
This is the straightforward case. If there's a full wall running alongside the toilet, a horizontal side-wall rail paired with a rear-wall rail covers both the sitting and standing phases of a transfer. This layout gives the most reach options and the most consistent support, and it's the one most grab rail products are designed around by default.
Layout 2: Narrow Side Wall or Partial Wall
Some bathrooms have a side wall, but it's too short to fit a full 42-inch rail, or it's broken up by a door swing, a vanity, or a plumbing fixture. In this case, a shorter angled rail — combining a horizontal and vertical section — can provide support through a smaller footprint than a full straight bar, covering both the reach-down and stand-up motions in less linear space.
Layout 3: No Side Wall at All
This is the layout that trips up the most DIY installations, because the standard two-bar approach simply doesn't apply. Without a side wall, a floor-to-ceiling support pole, installed close enough to the toilet to be useful during a transfer, is usually the better solution. These poles tension between the floor and ceiling (or anchor into both, depending on the model) and don't require wall blocking at all, which makes them a practical option in bathrooms where the toilet sits against a short wall, a door, or an open doorway.
A rear-wall-only rail is sometimes used as a fallback here, but it's worth being clear-eyed about its limits: a single rear bar provides support for pushing up from a seated position, but it doesn't give the same leverage for the lateral stability a side-wall bar offers during the transfer itself.
Not sure what layout fits your bathroom? Every toilet area is different, and the right rail configuration depends on your specific wall layout and clearances. Contact us and we'll assess your space before recommending anything.
Layout 4: Corner-Set Toilets
Toilets positioned in a corner — common in smaller powder rooms and older homes — present their own layout puzzle. One wall is typically close enough for a standard side-wall rail, but the second wall may be at an unusual angle or too close to allow a full 42-inch rail. In these cases, a shorter rail on the available wall, combined with an angled or flip-up bar on the adjacent surface, often provides more usable support than trying to force a standard horizontal bar into a space that wasn't designed for it.
Layout 5: Shared or Multi-Use Bathrooms
In bathrooms used by multiple household members — not everyone needing the same level of support — flip-up or swing-away rails offer a practical middle ground. They provide full support when needed and fold flush against the wall when not, which matters in smaller shared bathrooms where a permanently extended bar might otherwise be in the way during regular use.
Layout 6: Renovated or Retrofitted Bathrooms
Homes being renovated specifically for accessibility — whether for aging in place, recovery from surgery, or a family member's changing mobility needs — have an advantage that a quick retrofit doesn't: the opportunity to plan wall blocking before the walls are closed up. If a renovation is already underway, it's worth deciding on the full toilet-area rail layout before drywall or tile goes up, rather than retrofitting afterward. Blocking installed in advance, across a wider section of wall than the rail itself requires, also allows for layout changes later — a second rail added, or a rail repositioned — without having to open the wall again.
For bathrooms that aren't mid-renovation, retrofitting still works, but it typically means locating existing studs or opening a small section of wall to install blocking after the fact — a more involved process, but a necessary one if the existing framing doesn't line up with where a rail needs to go.
Layout 7: Bathrooms Shared With Young Children or Guests
Accessibility upgrades aren't always permanent household fixtures used by one person. In bathrooms used by a rotating mix of family members, guests, or children, a rail that's always extended can occasionally become an unexpected obstacle rather than a help — something to keep in mind when choosing between a fixed rail and a flip-up design. A flip-up rail resolves this by staying out of the way during regular use and folding down only when needed, without sacrificing the load rating that makes it useful in the first place.
Choosing Rail Material and Diameter Regardless of Layout

Whatever the layout, the rail itself should meet the same baseline: a diameter between 1.25 and 1.5 inches for a secure grip, a slip-resistant surface, and a minimum 250-pound load rating. Stainless steel remains the standard material for durability in a wet environment, and a textured or knurled grip surface matters more in a toilet-area rail than almost anywhere else in the bathroom, since this is often where someone is bearing the most weight during a transfer.
Ready to get the right layout installed? Our professional installers evaluate your specific bathroom and install accessible toilet grab rails anchored to full ADA load standards, whatever your layout calls for. See our grab bar installation service to get started.
Why Layout Matters More Than the Rail Itself

A high-quality, properly rated grab rail installed in the wrong spot — too far to reach, at the wrong height, or configured for a layout that doesn't match the bathroom — doesn't deliver the safety benefit it's meant to. This is the main reason a one-size-fits-all approach to toilet grab rails often falls short: the rail itself is rarely the limiting factor, the layout decision is.
For more detail on how toilet-area grab rails support everyday use, see our guide on how handicap toilet grab bars can help you, and for placement specifics by wall configuration, read the right placement for a toilet grab bar.
Frequently Asked Questions
1. What's the best toilet grab rail layout for a small bathroom?
In bathrooms without a usable side wall, a floor-to-ceiling support pole typically works better than trying to fit a standard horizontal bar into limited space. Where a short side wall exists, an angled rail can provide support in a smaller footprint than a full straight bar.
2. Can I use just one grab rail near the toilet?
A single rail can provide partial support, but two rails working together — typically a side-wall and rear-wall combination — give more consistent support through a full sit-to-stand transfer. If only one rail is possible, a side-wall rail generally offers more practical support than a rear-wall rail alone.
3. What if my toilet is in a corner with two short walls?
A shorter rail on whichever wall allows it, combined with an angled or flip-up bar on the adjacent surface, often works better than forcing a standard-length bar into a space that doesn't fit it.
4. Do floor-to-ceiling poles need to be anchored into a wall?
Not necessarily. Many floor-to-ceiling support poles tension between the floor and ceiling independently of wall blocking, which makes them useful in layouts where there's no side wall at all. Specific anchoring requirements vary by product.
5. Are flip-up grab rails as sturdy as fixed rails?
Quality flip-up rails, when properly installed and locked in the extended position, can meet the same load standards as fixed rails. They're a practical option in shared or multi-use bathrooms where a permanently extended bar would be in the way.
6. What diameter should a toilet grab rail be?
A diameter between 1.25 and 1.5 inches is generally recommended, giving a secure full-hand grip while still providing enough surface area to bear real weight.
7. How do I know which layout is right for my bathroom?
It depends on your specific wall configuration, available clearance, and who will be using the rail. An in-person assessment is the most reliable way to match a layout to your actual bathroom rather than guessing from a generic recommendation.


Comments